Growing up, whenever we'd eat pasta with red
sauce, it would undoubtedly be sauce from a jar. I didn't think much
of it of course – it was quick and easy and my young taste buds
certainly didn't appreciate anything gourmet. Then one night when I
was in high school a couple of my parents’ Italian-American friends came over
for a little dinner party and they did the cooking. On the menu: homemade red
sauce. “Homemade?!” we said, “Wow, what an extravagance!” We were easily
impressed. Their response, dripping with incredulity, was “Duh, homemade is the
only way”.
Fast
forward to several years later, to my first year out of college, living in New
York, eating pasta on the reg (still using sauce out of a jar), when my boyfriend came to
visit for the first time all the way from Italy. Let me start by saying,
Italians have certain “rules” when it comes to food. (Nicco will argue that they’re
not rules, but they totally are.)
First,
three meals a day is expected, mandatory and it’s absolutely unacceptable to
assume that anything less than that will suffice. Oh, you follow that rule too simply
as a normal human being? Well, my roommate and I didn’t and we quickly learned
that our little snacking habit and meals-here-and-there-lifestyle weren’t going
to cut it while an Italian was in the house.
Second,
pasta is always for lunch, never for dinner (barring a rare exception to the
rule). Third, meat and pasta don’t mix (you should have seen his face when I
first poured a plate of chicken into a pot of pasta-pure disgust, I tell you).
Fourth,
when it comes to red sauce, you make your own and it doesn't have to be
complicated or time consuming. And with that, I’ll prove it to you, you
non-believers!
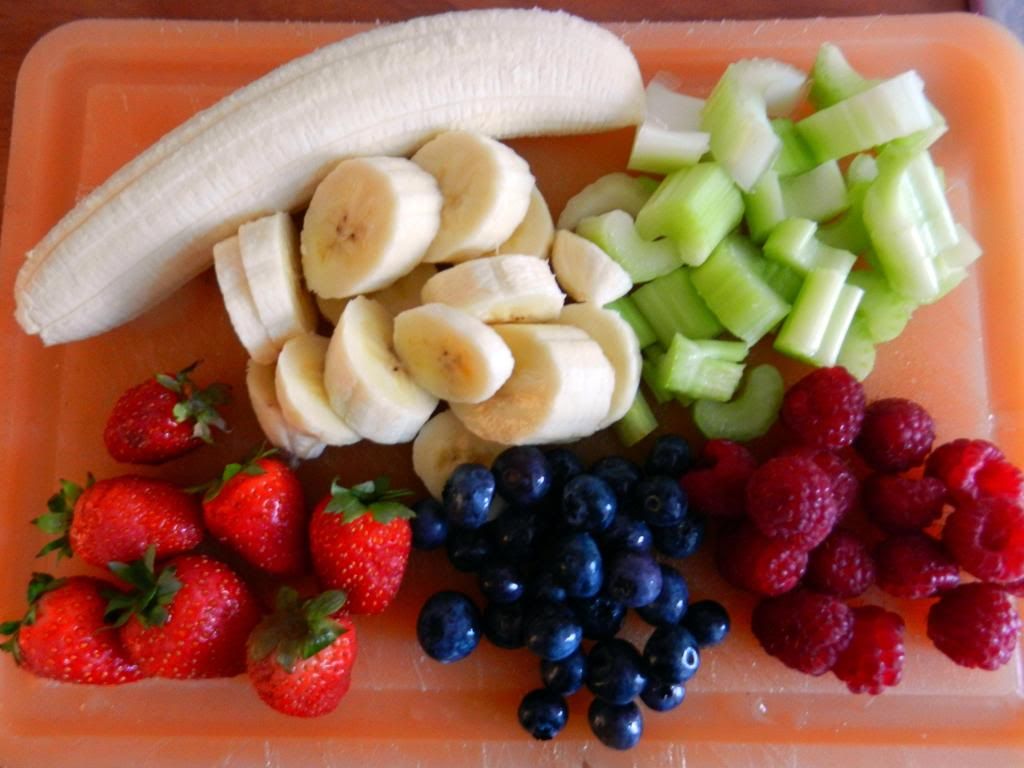
Gather
up your veggies. I used garlic, onion, carrot, celery, parsley and basil. There you go, bonus points for homemade red sauce: it’s healthy! To
make an even more basic sauce, all you really need is garlic and onions.
Then
break out the olive oil and tomato base. I used Pomi because it can be easily
found in the U.S. as well.
Put
the water on to boil while you start the sauce. Heat
olive oil in a skillet and add minced garlic and chopped onion to sauté. Side
note: the veggies should be chopped up a bit more than this, but I was using a
dinky knife and sometimes chunky is good.
Once the onions have browned a bit, throw in the carrots, celery and parsley. Reduce the heat to low and let it cook for a few minutes, stirring occasionally.
When the carrots have softened, add in the tomato base and the basil. Add salt and paper to taste, bring to a low simmer and let it cook uncovered until it thickens a bit.
By
this point, the water will already have been boiling so throw in the pasta to
cook and when the pasta is done, your sauce will be ready as well. If you have
more time, you can leave the sauce to simmer for a longer amount of time, even
a couple hours if you’d like, and it’ll soak up the flavors to a greater extent.
That’s
it! Sprinkle some Parmesan cheese on there and you’re done! Easy peasy!
When it comes to pasta sauce, do you typically reach for the jar or make it yourself?